Quick Start - five easy steps to recovering your pictures!
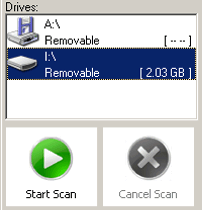
1. Start PHOTORECOVERY® and choose your removable media from
the list by drive letter. Select the physical device if no drive letter has been assigned to your
media.

2. Choose the type of image file you are looking for, or select the model
camera you are using.

3. Click the Options button and select the destination for your saved images. Do not select your media card as the destination, as this will destroy the data on the card and it will not be recoverable! Choose a separate drive and folder. The default is My Documents\My Pictures\Recovered.

You can also choose to save the files by category in the Options screen. This will save the files in subfolder categories in your destination folder.

4. Click the Start Scan button, and allow the scan to run all the way through on your media. Your files will automatically be saved in the destination folder

As the scan progresses, you will see image file names show in the list. You can click on any image file name to show a preview of the picture. You can also right-click the mouse in the file name area to view details, list, tiles, or thumbnails.

5. When the scan is finished, you will get a scan completed message.

That is all there is to recovering those pictures you thought were gone forever!